Showing posts with label baking. Show all posts

Saturday, July 14, 2012

Black Raspberry Thumbprint Cookies

Thumbprint cookies at the potluck

Black Raspberry Thumbprint Cookies
low carb, sugar free, gluten free

2 1/2 cups almond flour
1/4 teaspoon salt
1/2 cup butter, softened
1 tablespoon agave nectar
1/4 cup Swerve granulated erythritol
1 egg or 1/4 cup egg substitute
1 teaspoon vanilla extract
3 tablespoons sugar free black raspberry jam (recipe follows)

In the bowl of an electric mixer, cream butter with Swerve. Add agave, egg, and vanilla extract and mix until combined. Add almond flour and salt, mix just until combined. Put bowl in refrigerator for 1 hour or until dough is easy to handle.
Preheat oven to 350F. Line baking sheets with parchment paper. Scoop about 1 tablespoon of dough and roll into a ball with your hands. Place balls of dough on cookie sheet about 2 inches apart. Use your thumb to make an indentation in the dough. Fill indentations with about 1/4 teaspoon jam. Bake 12-16 minutes or until golden brown and set. Remove from oven and cool on baking sheet for 5 minutes, then remove to a wire rack to cool completely. Cookies will firm up as they cool.
Makes about 28 cookies.

Black raspberry jam
sugar free, gluten free

3 pints black raspberries (or red raspberries for regular raspberry jam), picked over and rinsed
1/2 cup agave nectar
1/2 teaspoon liquid stevia extract
2 teaspoons Pomona's pectin powder
2 teaspoons calcium water (calcium powder included in Pomona's pectin package, follow package directions to make calcium water)

In a large (4 cup) glass measure or other flat bottomed bowl, crush the berries with a potato masher.

Crushing raspberries


Force about 1/2 of the crushed berries through fine sieve to remove the seeds. You may also strain all of the crushed berries through the sieve for seedless jam, but it will result in less finished jam. In a small glass measuring cup or small bowl, combine agave, stevia, and pectin powder and stir thoroughly. Set aside. Pour crushed berries into a 8 quart saucepan. Add calcium water and stir thoroughly. Heat over medium high heat, stirring constantly, until the berry mixture comes to a full boil. Add agave mixture to berry mixture, and bring back to a full boil. Remove from heat.
 Ladle into prepared, sterilized half pint jars and process in a water bath for 10 minutes to make jam shelf stable for up to 1 year until opening. For more information on water bath canning, visit the USDA's complete guide to home canning  If you do not want to water bath process your jam, you can keep it in the refrigerator and treat it as a perishable.
Makes 4 half pints (or 2 half pints of seedless jam)

Strawberry, raspberry, strawberry, raspberry

Thursday, July 5, 2012

Blueberry mascarpone tart

Ready to serve

Bright fresh blueberries, creamy mascarpone, and just a hint of aromatic lemon zest make a refreshing summer tart, perfect for a picnic.

Blueberry Mascarpone Tart
sugar free, gluten free, low carb 
Recipe adapted from Donna Hay magazine online

Crust
2 cups almond flour
6 tablespoons butter, melted
1/3 cup sugar free vanilla whey protein powder
1/4 cup Swerve granulated erythritol

Filling
1- 16 ounce container mascarpone cheese
2 tablespoons finely grated lemon zest
1 cup Swerve erythirol confectioners style, sifted
1 pint fresh blueberries, rinsed and dried

11" tart pan with removable bottom

Preheat oven to 350 F. Mix almond flour, melted butter, protein powder, and Swerve granulated in a medium bowl until combined. Transfer crumb mixture into tart pan, and press firmly into the bottom and up the side of the pan. Bake 10-12 minutes or until lightly browned. Place tart pan on a wire rack and allow to cool completely.

Mix mascarpone, lemon zest, and Swerve confectioners in a medium bowl until combined. Spoon into cooled crust and spread evenly. Top with fresh blueberries. Refrigerate until chilled, about 2 hours. Remove outside ring from tart pan before serving.

Have a slice

Tuesday, May 8, 2012

Pear blackberry tart with hazelnut crumb

Have a slice


Pear blackberry tart with hazelnut crumb
gluten free, low carb

Crust and topping
1/2 cup hazelnuts 
3 cups almond flour
1/2 cup vanilla whey protein powder
8 tablespoons butter, melted
2 tablespoons Swerve (granulated erythritol)

Blackberry filling
1 12-ounce package frozen whole blackberries
2 tablespoons creme de cassis (or 2 tablespoons water)
2 teaspoons tapioca flour
2 tablespoons water
20 drops stevia extract

Pear filling
4 medium ripe pears
2 tablespoons Swerve (granulated erythritol)
1/2 teaspoon five spice powder
1/2 teaspoon freshly ground nutmeg
1 teaspoon tapioca flour
1 tablespoon water 

 11" tart pan

Preheat the oven to 350F. Spread the hazelnuts on a baking sheet and bake until fragrant 10-15 minutes. Remove from oven and set aside until cool enough to handle. Spread the cooled hazelnuts on a clean dish towel, top with another clean towel, and rub the towels together to remove the skins. Discard skins. Chop hazelnuts.

Skin the nuts


In a large bowl, mix together almond flour, protein powder, and melted butter. Transfer 2 1/2 cups of the mixture into an 11" tart pan with removable ring. Press mixture firmly into bottom and slightly up sides. Bake crust at 350F for 10 to 12 minutes or until lightly golden. Set aside to cool. Mix chopped hazelnuts and Swerve into remaining almond flour mixture. Set aside.

Make the crust

Combine blackberries and cassis in a medium saucepan.  Cook, stirring occasionally, over medium heat about 15 minutes until berries begin to break down. Remove from heat, pour berries into a fine sieve positioned over a bowl. Press the berries through the sieve until just the seeds remain in the sieve. Transfer puree back into saucepan, add stevia extract, and return to medium-low heat. In a small bowl, dissolve 2 teaspoons tapioca flour in 2 tablespoons cold water. Pour tapioca mixture into berry puree, and stir until thickened. Remove from heat and set aside to cool.

Prep the fruit

Peel, core, and slice pears thinly. Transfer sliced pears to a medium saucepan. Add five spice powder, nutmeg, and Swerve. Cook over medium-low heat, stirring occasionally, for about 15 minutes, until pears release their juices and are softened, but still retain their shape. In a small bowl, mix 1 teaspoon tapioca flour with 1 tablespoon water. Pour tapioca mixture into pears, stir and cook until thickened. Remove from heat. 

Arrange the pears

Spread blackberry puree evenly over crust. Arrange pears in a single layer over blackberry puree. Sprinkle hazelnut crumb mixture evenly over top of tart. Bake at 350F for 15-20 minutes, or until topping is lightly browned. Cool completely in pan. Remove ring from tart pan to serve. Serve with whipped cream.

Finshed tart #2

Tuesday, March 27, 2012

Yellow cupcakes with whipped ganache

Yellow cupcakes with whipped ganache

Yellow cupcakes with whipped ganache
 grain free, gluten free, sugar free, reduced carb

I made these to treat myself and my coworkers for my birthday. They were the perfect combination of decadently rich chocolate and sweet, buttery tasting cake. I used the Spunky Coconut's Vanilla Bean Cake recipe, substituting 1/3 cup of Swerve granulated erythritol for the honey in Kelly's recipe.

Yellow cupcakes with whipped ganache

For the whipped chocolate ganache:
16 ounces unsweetened chocolate
2 cups heavy cream
Liquid stevia to taste (I used about 1 teaspoon for a bittersweet ganache)

Chop the chocolate and combine with the cream in a microwave safe bowl. Heat until the cream is hot and the chocolate has just begun to melt. Stir until the chocolate melts completely. Add liquid stevia to taste. Allow the mixture to come to room temperature. It may curdle as it cools, that is ok, it will emulsify when whipped. Whip the room temperature ganache with an electric mixer on high until light and fluffy. Pipe onto cupcakes using a pasty bag with a large star tip.  

Store the cupcakes in the refrigerator, but bring to room temperature before serving.


Tuesday, February 21, 2012

Chocolate meringue cookies

Chocolate Meringue Cookies

These crunchy little blossoms of intense chocolate flavor only taste like an indulgence. They're gluten free, low carb, and low fat, and at only about 12 calories a cookie, you can treat yourself to two or three (or five). I brought them to a pot luck recently, and they were a hit. No one suspected I was giving them health food!

Chocolate Meringue Cookies
sugar free, low carb, gluten free, low fat 

4 egg whites
1 cup Swerve
1/8 teaspoon cream of tartar
1/2 teaspoon vanilla
3 ounces unsweetened chocolate
cocoa powder (for dusting)

Preheat oven to 225F. Line two baking sheets with parchment paper. Fit a pastry bag with a large star tip (Wilton 1M).
Melt 3 ounces chocolate (Microwave @50% power, 2-3 minutes. Stir until melted.) Set chocolate aside to cool.
In the bowl of an electric mixer, combine egg whites, Swerve, and cream of tartar. Set a large pot or deep skillet (large enough to place the mixer bowl inside) with 2 inches of water over high heat on the stove. Bring the water to a simmer, then reduce heat and keep at a simmer. Place the mixer bowl with egg mixer into the water.
Stir egg mixture over water bath until mixture is warm to the touch and Swerve has dissolved (rub the mixture between your finger and thumb, when you no longer feel crystals, it has dissolved). Turn off the stove.
Remove the mixer bowl from the water bath and transfer to mixer with a wire whisk attachment. Beat on medium speed until foamy, then increase speed to high. Beat until stiff, glossy peaks form. Add vanilla and continue to beat until combined. With a spatula, gently fold the melted, cooled chocolate into the meringue.

Meringue

Load the meringue into the prepared pastry bag (set the bag inside a tall glass to hold it while you fill it). Pipe 1 1/2" diameter blossoms onto parchment lined baking sheets. Dust with cocoa powder. Bake at 225F for about 90 minutes, or until the tops of the cookies are dry to the touch and you can peel the parchment away from the bottom easily.

Chocolate Meringue Cookies


Slide the cookies, still attached to the parchment, onto a cooling rack. Allow to cool completely before peeling from parchment. Store in an airtight container.

Chocolate Meringue Cookies

Tuesday, February 7, 2012

Classic Cheesecake

Classic Cheesecake

Cheesecake is my husband's favorite dessert, which is lucky for me, because it is an easy sweet to make low carb. This is The Joy of Cooking's old-fashioned cheesecake with substitution of Swerve granulated for the sugar in the original recipe, and the addition of an almond flour crust. I made the cheesecake upon his request for hubby's birthday cake. The coulis was a last minute creation, and a bag of mixed berries is what I had in the freezer. The coulis would be equally good with whatever fresh or frozen berries you have on hand.

Classic Cheesecake with Triple Berry Coulis 
low carb, gluten free 

Crust
1 1/2 cups almond flour
1/4 cup vanilla flavored sugar free whey protein powder
4 tablespoons butter, melted

Filling
3- 8 ounce packages cream cheese
1 cup Swerve
1 teaspoon vanilla extract
3 large eggs

Topping
1 cup sour cream
1/4 cup Swerve
1 teaspoon vanilla extract
1/8 teaspoon salt

Triple Berry Coulis
1 cup frozen mixed berries (blueberry, strawberry, raspberry), defrosted
2 tablespoons agave nectar (or other sweetener, to taste)

Classic Cheesecake

     Preheat the oven to 350F. Combine crust ingredients in a medium sized bowl, mix until combined. Press evenly into the bottom of a 10 inch springform cake pan. Don't try to build the crust up the sides of the pan, but do cover the seam. Bake 10-12 minutes or until golden brown around the edges. Allow the crust to cool completely before making the filling.
     Have filling ingredients at room temperature. Preheat the oven to 300F. Using a stand mixer with a paddle attachment, beat cream cheese until creamy. Gradually beat in Swerve and vanilla. Beat in eggs one at a time, stopping to scrape the sides of the bowl and beater between additions. Pour the filling into the prepared, cooled crust. Bake at 300F for 30 minutes, then shut off the oven. Allow the cheesecake to rest in the oven with the door cracked open (put the handle of a wooden spoon into the door) for an additional 30 minutes. Remove the cheesecake to a wire rack and allow to cool completely before making topping.
    Combine sour cream, Swerve, vanilla, and salt in a medium sized bowl. Spread over cake. Cover and refrigerate at least 3 hours, preferably overnight, before removing ring of pan and serving.
     Place the defrosted berries and agave nectar (or other sweetener) into a blender. Blend on high until liquified. Strain if desired. Serve cheesecake with a drizzle of coulis.

Friday, January 13, 2012

Fudgy Raspberry Swirl Brownies

Raspberry Swirl Brownies


I often bake for milestone celebrations like birthdays and holidays. I like to save my treats for such occasions, both to make them feel more special, and to keep myself from over-indulging on a regular basis. Sometimes, when I really feel like baking, I find my own occasion. Last week a coworker had my back during a stressful time, so I wanted to bring him a treat to thank him. I was planning on baking Thursday night, but it had downpoured all day long, and my 100 year old field stone foundation usually takes on water in such situations. I was positive I was going to come home from work to a wet basement. I got home that night, prepared to break out the utility pump and the wet/dry vac, and found my basement was dry. So I baked brownies to celebrate my luck! These are a new take on my Peanut Butter Swirl Brownies, now with a berry twist, and the same secret ingredient, canned black beans.


Raspberry Swirl Brownies
Reduced carb, sugar free, and gluten free

4 ounces unsweetened chocolate
1/2 cup unsalted butter
1 can (15 ounces) black beans, drained and rinsed well
1/2 cup almond flour
1 tablespoon raspberry extract
1/4 teaspoon salt
1 cup liquid egg substitute (or 4 large eggs)
1 1/2 cups light agave nectar
1/4 cup sugar free seedless raspberry preserves
1 bar (3.5oz) sugar free, low carb dark chocolate (Simply Lite), chopped (optional)

Preheat the oven to 325 F. Line a 9x13 inch pan with parchment paper and lightly coat with non-stick spray. In a microwave safe bowl, melt the chocolate and the butter on 50% power for 2 to 3 minutes. Stir until completely melted. Place the beans, almond flour, raspberry extract, salt, and a few tablespoons of the melted chocolate mixture into a food processor and blend until smooth. In a separate bowl, with an electric mixer, beat the egg substitute (or eggs), then add the agave nectar and beat well. Reserve about 1/2 cup of the egg and agave mixture, set aside. Add the bean mixture and the rest of the chocolate mixture,and the chopped chocolate (if using) to the agave and eggs. Mix well. Pour the batter into the prepared pan. Using an electric mixer, beat the reserved agave and egg mixture with the raspberry preserves. Drizzle over the brownie batter in the pan. Use a butter knife to pull the raspberry mixture through the batter, creating a swirled effect. Bake for 30 to 40 minutes, or until just set in the center. Let cool in the pan completely. Refrigerate overnight or until completely chilled through for the best flavor and consistency.

Thursday, September 15, 2011

Apple Spice Muffins

Apple Muffins

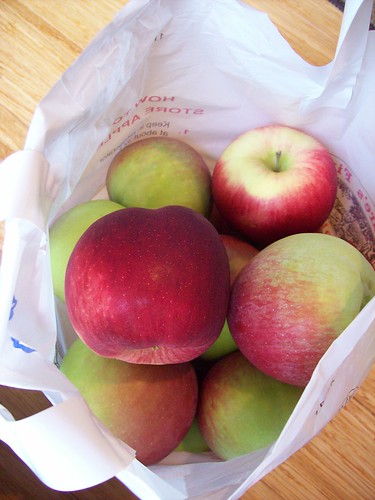
I went apple picking earlier in the week. After eating fresh apples out of hand and whipping up a low carb apple crisp, I turned to the internet looking for more apple treat recipes. Instead, I found All Day I Dream About Food's Zucchini Walnut Spice Muffins
In her muffin post, Carolyn was lamenting the lack of zucchini in her garden this year. I can sympathize with her. Out of my three plants only one bore fruit, and it only produced two zucchinis.  I had no zucchini abundance with which to make muffins, but a half peck of apples happy to join the party.


Apple Muffins

I adapted Carolyn's recipe to suit the contents of my pantry and was thrilled with the results. I used two apples, peeled cored and finely chopped to replace the zucchini, and I left out the walnuts.

Apple Muffins

Apple Spice Muffins (adapted from ADIDAF's Zucchini Walnut Spice Muffins)

low carb, sugar free, gluten free 

2 cups apples (about 2 large fruit), peeled, cored, and finely chopped
1/3 cup plain yogurt
1/2 cup liquid egg replacement (Eggbeaters)
1/2 tsp vanilla extract
1 1/2 cups almond flour
1/2 cup soy flour
1/4 cup vanilla whey protein powder
1/4 cup Truvia
2 tsp baking powder
1/2 tsp baking soda
1 tsp ground cinnamon
1/2 tsp ground ginger
1/4 tsp ground cloves
1/8 tsp salt
1/4 cup skim milk
1/4 cup coconut oil, melted

Preheat oven to 325F and line 12 muffin tins with paper liners.

In a large bowl, mix together apples, yogurt, egg replacement, and vanilla until well combined. If you mix the apples into the yogurt mixture as soon as you have finished cutting them, they won't turn brown.

In a medium bowl, mix together the almond flour, soy flour, whey protein powder, Truvia, baking powder, baking soda, spices, and salt.

Add the flour mixture to the yogurt mixture in two additions, alternating with the milk, and then beat in the coconut oil until thoroughly combined.

Divide batter among prepared muffin tins. Bake 28 to 32 minutes, or until lightly browned on top and a toothpick inserted into the center comes out clean. Allow to cool in pan 5 minutes, then remove to a wire rack to cool completely.

Saturday, May 21, 2011

Crisp of choice

 I love rhubarb season! My dad has a patch in his garden, so I made a stop last weekend to score some giant, crisp stalks. Pair the refreshing tartness of rhubarb with the juicy sweet redness of strawberries, top with crisp sweet crumbs, and you've got a perfectly pink spring treat. Not a rhubarb fan? Neither is my husband. So double the crumb recipe, slice up some apples, and make a pair of crisps. 

Crisp of choice: Strawberry-Rhubarb or Apple
 Low carb and sugar free


Crisps

Strawberry and rhubarb filling
4 cups rhubarb (about 4 large stalks), cut into 1/2 inch pieces
2 cups strawberries, hulled and quartered
1/4 cup truvia (or 1/2 cup splenda)
1 tablespoon cornstarch
1 tablespoon butter

Apple filling
4 cups peeled, cored, and sliced apples (about 4 medium sized fruits)
1 teaspoon ground cinnamon
2 tablespoons Truvia (or 1/4 cup Splenda)
1 tablespoon butter

Crumb topping
Enough for one crisp. Double the measurements to make both.
3/4 cup rolled oats
1/2 cup almond flour
2 tablespoons Truvia (or 1/4 cup Splenda)
1/2 teaspoon ground cinnamon
1/2 teaspoon fresh ground nutmeg
4 tablespoons butter

Fillings

Preheat oven to 350F. Mix filling ingredients except butter in a large bowl. Pour into a 2 quart casserole or baking dish. Cut 1 tablespoon of butter into bits and scatter over the top of the filling. In another mixing bowl, combine all crumb topping ingredients except butter. Cut the butter into small pieces, add to dry crumb ingredients, and work together with a pastry cutter or two knives. Sprinkle topping evenly over filling. Bake at 350F for 40-50 minutes, or until topping is lightly brown, fruit juices bubble up around the edges, and the fruit is soft when pierced with a knife. Allow to cool for at least 1 hour. Serve warm or at room temperature, with low carb vanilla ice cream or whipped cream, if desired.


Tuesday, April 26, 2011

Strawberries and Cream Pie

Strawberries & cream pie

Strawberries and Cream Pie
Sugar free, low carb, and gluten free.
 
Crust
1 1/2 cups blanched almond flour
1/4 cup sugar free vanilla protein powder 
4 tablespoons butter, melted

Filling
1/2 cup sugar free strawberry preserves
2 packages sugar free cook and serve vanilla pudding mix
3 1/2 cups skim milk

Topping
8-10 fresh strawberries, sliced
1 cup heavy cream
5 drops liquid stevia (or to taste)


Preheat oven to 350F. Combine crust ingredients in a medium bowl and mix well. Firmly pat mixture into the bottom and halfway up the sides of a pie plate. Bake for 10-12 minutes or until lightly golden. Set aside to cool for about 15 minutes.
Gently spread strawberry preserves to cover bottom of crust. Set aside.
In a medium size saucepan, combine pudding mix and milk. Whisk until combined. Cook over medium heat, stirring often, until it comes to a full bowl. Remove from heat and allow to cool in the pan for 5 minutes, then stir. Pour pudding into crust. Refrigerate for 3 hours or until chilled completely.
Slice strawberries. Arrange on top of chilled pie.

Strawberries & cream pie

Place medium size bowl and whisk (or whisk attachment of electric mixer) into the refrigerator to chill for about 15 minutes. Place cream in chilled bowl, and whisk until thickened. Add stevia to taste. Continue to whisk until the cream reaches soft peak consistency.
Serve pie with a dollop of whipped cream.

Tuesday, March 15, 2011

Oooh, cheesecake...

Blueberry swirl mini cheesecakes

Blueberry Swirled Mini Cheesecakes
Sugar free, low carb, and gluten free.

Crust
1 1/2 cups almond flour (Bob's Red Mill)
1/4 cup sugar free vanilla flavored whey protein powder (Designer Whey)
4 tablespoons butter, melted

Cheesecake
2 cups cream cheese (two 8oz packages), softened
1 cup Neufchatel cheese (one 8oz package), softened
4 eggs or equivalent egg substitute
1 tablespoon freshly grated lemon zest
4 tablespoons freshly squeezed lemon juice
1/8 teaspoon salt
1/3 cup Truvia

Swirl
1 cup frozen blueberries, thawed
3 tablespoons agave nectar, or sweetener to taste

     Preheat oven to 350F. Line 18 standard muffin tins with cupcake liners. In a medium size bowl, mix almond flour and protein powder. Add melted butter and stir until thoroughly combined. Scoop about 1 1/2 tablespoons of crust mixture into each lined muffin tin, then use your fingers to pat it firmly into the bottom of the tin. Bake for 10-12 minutes or until lightly golden. Set aside to cool. Reset oven to 325F.
     Place blueberries in a blender or food processor, or use a stick blender and bowl. Blend until liquefied. Put a fine sieve over a small bowl and press blended blueberries through the sieve with the back of a spoon. Discard blueberry solids. Add agave nectar, or sweetener to taste, to the blueberry puree. Set aside.
     In the bowl of a stand mixer, or in a large bowl with a handheld mixer, beat together cream cheese, Neufchatel, and salt on low speed. Add Truvia, continue to mix at low speed for about 1 minute. Scrape down sides of bowl. Mixing at low speed, at eggs one at a time (or 1/4 cup egg substitute at a time), allowing each egg to blend into the mixture completely before adding the next. Scrape bowl and and paddle. Add lemon zest and juice, mix at medium speed for 2 minutes. Scrape bowl and beater, and mix for a few more seconds. Divide the filling mixture among the 18 cooled crusts, about 3 1/2 tablespoons per tin. Pick up and knock tin lightly against counter to settle the filling into the bottom of the tins. Drizzle about 1 teaspoon of blueberry puree on the top of each cheesecake, then draw a toothpick through to swirl.
     Place the cheesecakes on the middle rack of the oven and bake for 8 to 10 minutes or until just set in  the centers. Shut off the oven, open the door, and allow the cheesecakes to cool to room temperature in the oven. Remove cheesecakes from tins and refrigerate until chilled through. Serve chilled or at room temperature. Store leftovers in the refrigerator.

Monday, March 7, 2011

Macaroon or muffin?

Coconut Chocolate Chunk Muffaroons

Coconut Chocolate Chunk Muffaroons
Part macaroon, part muffin, completely tasty! Great for breakfast, snack, or dessert. Low carb, sugar free, and gluten free. 

4 tablespoons butter, softened
1 1/2 cups sugar substitute (Splenda)
4 eggs (or equivalent egg substitute)
 3 cups almond flour (Bob's Red Mill)
1 cup unsweetened shredded coconut
2 teaspoons baking powder
3 tablespoons coconut rum (or 3 teaspoons coconut extract)
2 teaspoons vanilla extract
1/4 teaspoon salt
1 bar (3.5oz) sugar free, low carb dark chocolate (Simply Light), chopped

Preheat oven to 350F. Line a 12 jumbo muffin or 24 standard muffin tins with cupcake liners. In a large mixing bowl, work butter and sugar substitute together. Add eggs, mix until incorporated, then add remaining ingredients. Mix until just combined. Divide batter evenly among the prepared pan, filling about 2/3 full. Place in middle rack of preheated oven and bake for 15 minutes, or until a toothpick stuck in the center comes out clean. Remove from oven and let cool 5 minutes. Remove from pan and let cool on a wire rack. Serve at room temperature. Store leftover muffaroons in a sealed container in the refrigerator.

Monday, February 14, 2011

The Secret Ingredient: Black Bean Brownies

Reduced-guilt Peanut Butter Swirl Brownies
 "Black beans?!" you say. Yep, don't tell and they'll never know. These are rich, fudgy, and peanut buttery, and my taste-testers ate them up without guessing they were reduced-guilt. Enjoy! Gluten free, sugar free, and low carb.

4 ounces unsweetened chocolate
1/2 cup unsalted butter
1 can (15 ounces) black beans, drained and rinsed well
1/2 cup peanut flour
1 tablespoon vanilla extract
1/4 teaspoon salt
1 cup liquid egg substitute (or 4 large eggs)
1 1/2 cups light agave nectar
1/4 cup peanut butter

Preheat the oven to 325 F. Line a 9x13 inch pan with parchment paper and lightly coat with non-stick spray. In microwave safe bowl, melt the chocolate and the butter in the microwave on 50% power for 2 to 3 minutes. Stir until completely melted. Place the beans, peanut flour, vanilla extract, and a few tablespoons of the melted chocolate mixture in to a food processor and blend until smooth. In a separate bowl, with an electric mixer, beat the egg substitute (or eggs), then add the agave nectar and beat well. Reserve about 1/2 cup of the egg and agave mixture, set aside. Add the bean mixture and the rest of the chocolate mixture to the agave and eggs. Mix well. Pour the batter into the prepared pan. Using an electric mixer, beat the reserved agave and egg mixture with the peanut butter until light and fluffy. Dollop over the brownie batter in the pan. Use a butter knife to pull the peanut butter mixture through the batter, creating a swirled effect. Bake for 30 to 40 minutes, or until just set in the center. Let cool in the pan completely. Refrigerate overnight or until completely chilled through for the best flavor and consistency.

Wednesday, November 24, 2010

M: T II, Just Desserts

Welcome to Mission: Thanksgiving II,  the second part of my South Beach friendly thanksgiving. This time the sequel may be better than the original, because this redux has cheesecake!

Sugared cranberries

Low carb cheesecake (based on Classic Cheesecake from Truvia.com)
Crust
1 1/2 cups hazelnuts
1/3 cup sugar free vanilla flavored protein powder
4 tablespoons butter, melted

Filling
2 cups (2 packages) cream cheese
1 cup (1 package) neufchatel cheese
1 cup egg substitute (or 4 whole eggs)
Zest and juice of 1 lemon
1/8 tsp salt
1/3 cup + 1/2 tsp Truvia

Preheat the oven to 350 degrees. Chop the hazelnuts finely or pulse in food processor to a fine texture. Stir in whey protein powder and then butter until well combined. Press evenly into the bottom of a 9" springform pan. Bake for 12 to 15 minutes or until lightly browned. Let the crust cool.
Drop the oven temperature to 325 degrees. Blend Truvia, cream cheese, neufchatel, and salt with an electric mixer on low speed for 1 minute. Continuing to mix on low speed, add 1/4 cup egg substitute (or one egg) at a time, allowing the mixture to blend 1 minute before adding more egg. Scrape down the bowl and paddles. Add the lemon juice and zest, mix at medium speed for 2 minutes. Pour batter into cooled crust, spread even. Bake for 35 minutes or until the edges are set but the middle of the cheesecake still jiggles. Shut off the heat and allow the cheesecake to cool slowly in the oven for about an hour. Refrigerate until ready to serve.

The whey protein powder I used is Designer Whey Protein, which is sweetened with stevia, and I bought it at Trader Joes. Truvia is a granulated stevia sweetener that is slightly more sweet than sugar and has a vanilla-like scent.

Sugared cranberries

Sugar-free Sugared Cranberries

1 package (12 oz) fresh cranberries
1 1/2 cups water
1 1/2 cups Splenda (or equivalent sweetener, such as 1/3 cup Truvia or 1/8 tsp liquid stevia)
1 cup Truvia

Rinse and drain cranberries. Pick out stems and any soft or mushy cranberries. Transfer berries to a medium bowl. In a small saucepan, combine water and Splenda, and bring to a bare simmer. Pour the hot liquid over the cranberries, cover with a small plate to keep the cranberries submerged, and macerate in the refrigerator overnight. The next day, drain the cranberries, removing and discarding any that have split open. Pour enough Truvia to cover the bottom of a large plate or shallow bowl. Put a handful of the still wet cranberries into the Truvia and shake to cover them. Remove the covered cranberries to a cookie sheet and repeat with more Truvia and cranberries. Allow the cranberries to sit on the cookie sheet for an hour so the coating will harden. Serve immediately or wrap the cookie sheet in plastic wrap and store in a cool dry place for a few days.

I used Splenda in the macerating liquid in this recipe because I had extra on hand and it dissolves very easily in water. For that same reason, it is not ideal to crust the berries with, as it will melt on contact and not make a nice granulated, snowy coating like the Truvia. If you choose to store the berries for a short time, don't put them in a completely airtight container and leave them in a single layer. The crust will soften and not adhere to the cranberries if they are piled on top of one another and sealed up tightly.
Serve these crunchy, sparkling little sweet-tart treats straight up in a candy dish to snack on, top your cheesecake with them, or add them to a  festive drink. Here's a cheery seasonal libation to float them in:

Ginger Spritzer
4 cups water
1 piece fresh ginger, about 5 inches long
1/2 teaspoon liquid stevia (or equivalent sweetener of your choice)
Seltzer water 

Slice the ginger thinly. You don't have to peel it. Combine sliced ginger with water in a medium saucepan. Bring to a bare simmer and cook about 30 minutes. Remove from heat and add liquid stevia. Allow the liquid to cool to room temperature. Strain through a fine sieve to remove ginger solids. Pour syrup into an airtight container and refrigerate until ready to serve. To serve, pour 1/2 cup ginger syrup over ice in a large glass. Fill the glass with seltzer. Top off with sugared cranberries and serve immediately.

If you're into libations of a more adult variety, try adding a shot of rum or vodka to your drink. Or nix the seltzer completely and serve the ginger syrup over champagne, as Martha Stewart suggests.

Mission: Accomplished.  Happy Thanksgiving, everyone!

Wednesday, March 10, 2010

Cupcakes

Tres leches cupcakes

I had a couple of cans of sweetened condensed milk, a can of table cream, and half a carton of eggs that needed using, so I searched the internet looking for a suitable recipe for a treat that would be easy to bring to work and share. Tres leches cupcakes fit my criteria perfectly. I used this recipe from The Noshery, but modified the milk mixture, using 1 can of table cream, 1 can of sweetened condensed milk, and a about 1/2 cup half and half.  After a taste test of whipped cream and frosting for toppings, I stuck with the frosting as the Noshery called for, but skipped the cherry and sprinkled on cinnamon instead. They came out perfect: light and fluffy with a nice moist center, and no soggy cupcake wrappers, which was my big fear. They were also a hit with my coworkers. I'll be making this recipe again.

Birthday cupcakes

The week after Tres Leches cupcake day, it was my birthday. So I made my own cake. I made the Yellow Butter Cake with Chocolate Frosting from Martha Stewart's Baking Handbook. I added one vanilla bean scraped into the vanilla extract in the batter for extra flavor, and I was a bit too generous on the chocolate frosting and ended up having to make a quick batch of vanilla (All- Purpose Frosting from The Perfect Cake by Susan G. Purdy) to finish the last six cupcakes. The variety was good, if unintended. Apparently some people favor vanilla over chocolate. Silly people. Add sprinkles and let the festivities begin!